Last updated: September 10, 2026
Key Takeaways
- An extension will usually help if the wet spot is within 3 to 6 feet of the downspout and gets worse right after rain.
- If it is under 6 feet, extension is often the first fix to try.
- Aim for at least 6 feet, and 8 to 10 feet if the yard allows it.
- Test with a hose for 5 to 10 minutes.
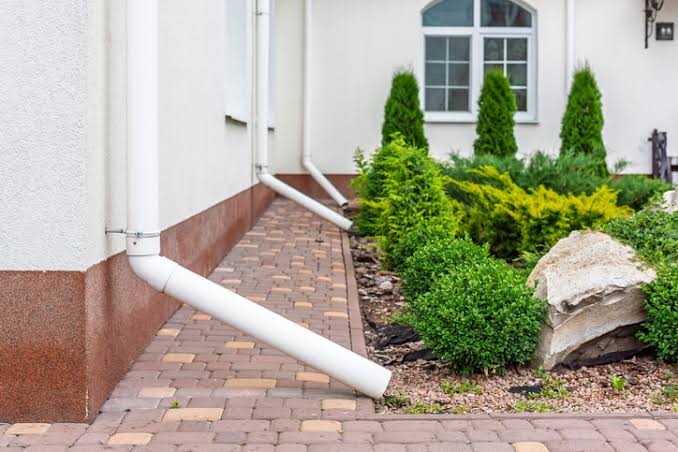
When roof water is still splashing down beside the foundation, a downspout drainage extension is often the simplest fix that actually does something. It works best on a lot that slopes away from the house and sends water 8 to 10 feet away from the foundation; it is just an add-on, though, not a cure for bad grading, clogged gutters, or an active foundation issue. If you are not sure which problem you have, call a drainage or foundation professional. The U.S. EPA and local extension guidance say surface runoff is handled best when it reaches a stable outlet instead of sitting by the wall.
Who this is for, and what it assumes you already have

This is for a homeowner who already has gutters and a downspout, but still sees water pooling near the foundation, muddy strips along the house, or erosion where the downspout dumps out. A downspout extension is the right tool when the roof runoff is the main problem and the yard has room to carry that water farther downhill.
I’m assuming you already know which downspout is causing the trouble, can observe where water currently lands, and can tell whether the ground falls away from the house at least a little. That slope matters. Flat yard? Or one that rises toward the house? Then a short extension usually just shifts the mess. The Natural Resources Conservation Service points to shallow swales and positive drainage as the basic pattern to aim for.
The rule is pretty plain: extensions work best when water can leave onto open soil, into a swale, or into another approved drainage path without backing up. “Swale” means a shallow, grassed depression that moves water sideways across the yard. If you have that kind of path, a 4-inch corrugated extension or a rigid section with a gentle run often does the job better than a fancier setup. No drama.
They are not the right answer if you already have signs of structural movement, repeated basement seepage, or a downspout connected to an underground drain that may be crushed or blocked. In those cases, an extension can hide the real issue for a while and make diagnosis harder. I would treat it as a surface-water fix, not a foundation repair, and if the symptoms point lower than the surface, consult a licensed contractor or engineer.
A good extension project also assumes your gutters are clean and pitched correctly. If the gutter is overflowing because it is clogged every time it rains, adding 10 feet of extra discharge does nothing. The water still spills at the eaves. In that case, fix the gutter first, not the tailpiece. The International Association of Certified Home Inspectors advises checking gutters and downspouts before adding drainage accessories.
Where do downspout drainage extensions work best?
They work best on lots where the release point can sit at least 6 feet from the foundation and the water can keep moving away on grade. That distance is the practical floor; in many yards, I would rather see 8 to 10 feet if the soil stays damp or the roof area is large. Bigger roof plane, bigger water load. Simple math. On older homes with larger roof sections, even a short extension may be undersized.
The best settings are usually straightforward:
- Sloped front or side yards where water can run over turf without cutting channels.
- Homes with clay soil where the ground near the wall stays wet after rain; getting water farther away reduces saturation at the footing.
- Driveways and walkways with a clear downhill path to a lawn strip or planting bed that can accept runoff.
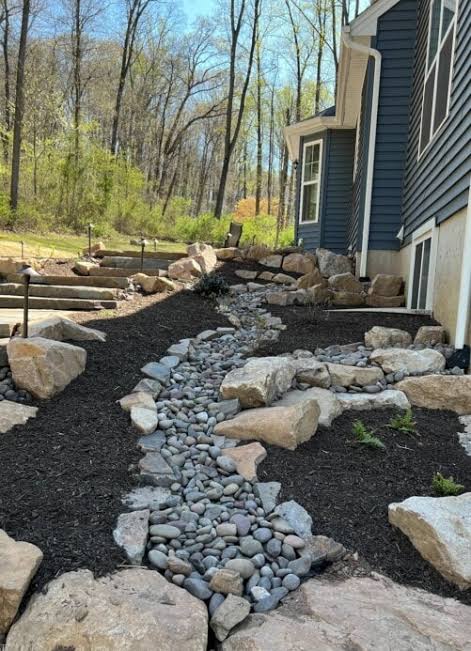
- Shallow swales that already move stormwater toward a street, ditch, or drainage basin.
It works less well on flat, compacted clay or where the house sits in a bowl. In those places, the discharge point may still pond. A 10-foot extension that ends in a puddle is not drainage; it is just relocation.
I also like extensions where the roof runoff is concentrated at one or two downspouts rather than many. A single point source is easier to manage than a whole roof edge that floods the soil. If one downspout carries the load from a valley, porch roof, or large upper roof, I would favor a rigid extension or buried pipe because the water volume is higher and splash erosion becomes more likely.
The least useful situation is when the house has a finished landscape that cannot tolerate a surface run. If you have tight side yards, stepping stones, or mulch beds that wash out, a surface extension can create a maintenance headache. In that case, a buried solid pipe with a proper outlet is often the cleaner route, though it adds cost and needs more care.
How do I know if an extension will actually solve the problem?
An extension will usually help if the wet spot is within 3 to 6 feet of the downspout and gets worse right after rain. That pattern points to roof water, not groundwater. I look for three clues: erosion directly under the outlet, mud streaks radiating from that point, and a foundation line that stays damp longer than the rest of the yard. The University of Minnesota Extension uses similar clues when distinguishing runoff problems from broader drainage failures.
Use this quick check before buying anything:
- Watch one rain event. See where the downspout discharges and whether that water reaches the wall, a low spot, or a drain path.
- Measure the distance from the outlet to the foundation. If it is under 6 feet, extension is often the first fix to try.
- Check the slope with a simple line level or a 2-foot level. If the ground drops away from the house by at least 1 inch per 8 to 10 feet, a surface extension has a better chance of working.
- Look for backflow. If water runs back toward the house after hitting a sidewalk, retaining wall, or driveway edge, the extension needs a different outlet.
- Inspect the soil type. Sandy or loamy soil accepts discharge better than heavy clay, which stays saturated longer.
- Confirm the gutter is not overflowing upstream. Overflow at the gutter edge means the outlet may not be the main problem.
- Check local rules. Some municipalities prohibit sending water onto sidewalks, adjacent lots, or storm systems without approval.
A good result is boring: no splash at the wall, no fresh rut under the outlet, and no standing water near the footing after a normal storm. If the extension only buys you one extra foot of muddy ground, it is not long enough or not pointed at the right place. Some local codes and stormwater manuals also require directing roof runoff to an approved discharge area, so verify the outlet before you install.
How do I install a downspout extension the right way?
Because the goal is to move roof runoff away from the house, install it so the water moves away in a continuous, secured path with no loose joints, reverse slope, or hidden low points, and consult a professional if the layout is unusual or if water already reaches the foundation. The exact method depends on whether you use a surface extension or a buried one, but the sequence is the same: connect, support, direct, and verify. Building departments and manufacturer instructions both emphasize keeping the route free of sags and separated joints.
- Measure the run from downspout to safe discharge point. Aim for at least 6 feet, and 8 to 10 feet if the yard allows it. Verify the line does not cross a spot where water can pool. A problem sign is a discharge point lower than the first 2 to 3 feet of run, which invites backflow.
- Choose the extension style that matches the yard. Use a rigid or corrugated 2×3-inch or 3×4-inch adapter for surface routing, or 4-inch solid PVC or polyethylene for buried routing. Verify the size matches the downspout outlet. A mismatch causes leaks and loose joints.
- Set the outlet direction first. Turn the elbow so water points toward the downhill path, swale, or lawn strip. Verify the outlet does not aim at a walkway, foundation planting bed, or property line. A problem sign is splashback against hardscape.
- Lay the extension with a slight fall. For buried pipe, keep a gentle slope of roughly 1/8 to 1/4 inch per foot toward the outlet. Verify the pipe never rises and dips. A low spot traps sediment and freezes in cold weather.
- Secure the joints. Use manufacturer-fit adapters, screws where appropriate, and sealant only if the product calls for it, and consult the product instructions if you are unsure. Verify each joint stays tight when pulled by hand. A problem sign is a joint that separates under the weight of runoff.
- Protect the outlet end. Add a splash block, pop-up emitter, or discharge grate depending on the layout. Verify water exits onto a stable surface, not bare mulch. A problem sign is soil scouring or mulch displacement after the first rain.
- Test with a hose for 5 to 10 minutes. Run enough water to mimic a heavy downpour on one downspout. Verify flow stays continuous and the end point drains within a reasonable time. A problem sign is standing water after the hose is off.
- Inspect after the next storm. Check for sediment buildup, loose elbows, or water marking on the foundation. A problem sign is any wet line on the wall below the discharge path, which means the route still ends too close or too high.
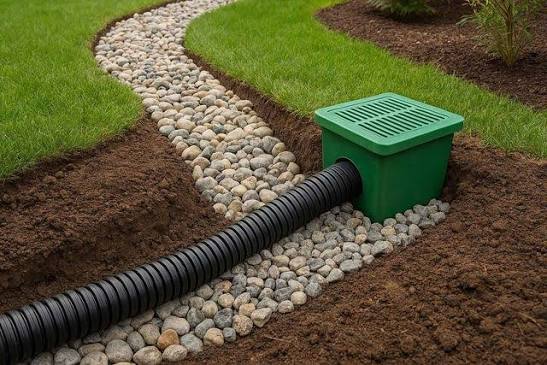
For a buried line, I prefer a solid pipe over perforated pipe. Perforated pipe is for collecting water, not carrying roof runoff cleanly away from the foundation. If the line is meant to move downspout water, perforations can leak it back into the soil before it reaches the outlet. That matches common stormwater practice from extension services and landscape-drainage guides.
The mistakes people make with downspout extensions
The biggest mistake is stopping too soon. A 2-foot extension often clears the wall but still dumps water in the splash zone, which keeps the soil wet right where the foundation needs to stay dry. The fix usually needs more length, and it needs a real outlet.
Another common error is sending water across a flat patio or sidewalk and calling it solved. That just creates slippery algae, staining, and a place for ice in cold weather. Better to route the discharge along a slope, into turf, or into a proper drain path.
People also use flexible tubing where the yard needs a fixed route. Flexible material is easy to install, but it kinks, sags, and flattens under leaf litter. That creates a restriction point. If the run must turn corners or stay visible, rigid sections with proper elbows are more dependable. Honestly, that trade-off is worth it.
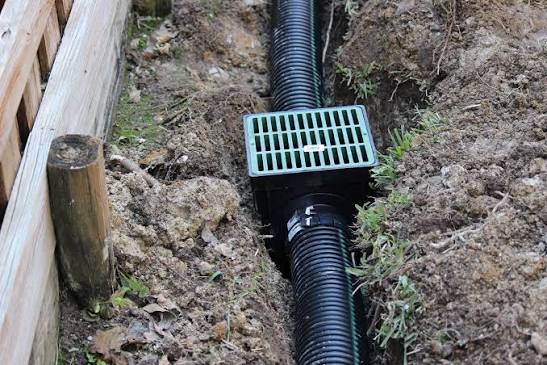
A fourth mistake is burying the pipe without cleanout access. Roof runoff carries grit, shingle granules, and leaves. Without an access point, a blockage becomes a digging job. If you bury the line, include a way to inspect or flush it.
The last frequent error is forgetting the rest of the drainage system. If the yard still slopes toward the house, a downspout extension only handles one stream of water. The better alternative is to pair the extension with grading, a swale, or a drain line that moves surface water away more broadly. In many cases, that wider fix matters more than the extension itself.
When should I stop and choose a different drainage fix?
I would stop using a simple extension when the problem is not really a discharge problem. In those cases, the extension is the wrong tool, and the fix needs to change.
The yard slopes toward the house for more than 10 feet: water will keep returning to the foundation — regrade the area or add a swale instead of extending the downspout alone.
The downspout empties into a clogged underground pipe: the line may be blocked or broken — unplugging the outlet will not fix the buried failure, so inspect or replace the line.
Water ponds within 2 to 3 feet of the foundation even after the extension: the outlet is still too close or the soil cannot absorb runoff — move the discharge farther away or convert to a buried solid line.
The site has a retaining wall, patio edge, or curb that traps runoff: water will back up and pool — discharge to the other side of the obstruction or add a controlled outlet.
You see basement seepage, wall cracking, or repeated sump-pump cycling after rain: the issue is beyond surface runoff — bring in a qualified drainage or foundation contractor before adding more extensions.
The extension would cross a neighbor’s property or a public sidewalk: that creates a runoff and liability problem — reroute to an approved outlet rather than forcing the path.
If the only way to make the extension work is to snake it through beds, across steps, or into a place that already floods, I would not force it. At that point, a French drain, regrading, a catch basin, or a buried outlet may be the better fix, and a drainage professional can help confirm the right option.
What about buried extensions, pop-up emitters, and other edge cases?
Buried extensions work best when the surface route is ugly, gets in the way, or freezes. A 4-inch solid pipe buried below grade with a pop-up emitter at the end is a clean way to move roof water to a lawn area, but it must drain freely. The emitter should sit where the ground falls away, not in a flat bed. In many homes, that setup is easier to hide than a long exposed extension.
The main edge case is winter. In cold climates, a shallow buried line can freeze if it holds standing water. That is why I avoid low spots and prefer a continuous fall. If freeze-up is common, a surface extension that can be disconnected seasonally may be safer than a buried run that traps ice. The best choice depends on how often temperatures stay below freezing and how exposed the outlet is.
Another edge case is heavy clay soil. Clay does not absorb discharge quickly, so a buried outlet must release to an area with room to spread. If the outlet dumps into clay a few feet from the wall, the pipe has not solved the drainage problem; it has only hidden it. The USDA and extension references commonly note that clay’s slow infiltration makes outlet placement more important.
On narrow side yards, I would also watch the roof load. A large section of roof can send enough water through one downspout that a tiny extension cannot keep up during a hard storm. In those cases, use the full outlet size the downspout supports, not a reduced adapter. For many homes that means staying with the original 2×3-inch or 3×4-inch outlet size instead of narrowing down to a garden-hose style attachment.
If you want a cleaner outlet without digging, a hinged or removable extension can work well on lawns and driveways. It is not as tidy as buried pipe, but it is easier to clear of leaves and easier to inspect after a storm.
What a good result looks like, and what it costs to get there
A good extension makes the area beside the house dry faster after rain, and it does so without creating a puddle somewhere else. The wall stays cleaner, the soil stops eroding at the outlet, and the downspout no longer spits water at the foundation. That is the benchmark I would use.
Cost depends on the setup, but the basic material is cheap compared with foundation repair. A simple surface extension can run about $10 to $30 for corrugated plastic parts or splash blocks, while a buried 4-inch solid-pipe run with fittings, emitter, and trenching can move into the $150 to $500+ range depending on length and labor. Local prices vary, and a contractor estimate is worth getting if the route crosses hardscape or needs a permit.
What matters most is whether the extension changes the wet pattern within a week or two of the first real rain. If the soil near the foundation dries out and the outlet area stays stable, you picked the right fix. If not, the problem is either too close to the house, too flat, or too big for a simple surface extension.