Last updated: September 10, 2026
Key Takeaways
- Call the local utility marking service, such as 811 in the U.S., and wait for marks before moving soil.
- Remove turf and organic mat from high spots and areas that need re-contouring, usually the top 1 to 3 inches.
- Build low spots with compactable soil in layers of about 4 to 6 inches per lift, not in one deep mound.
- Fourth, how will equipment reach the work zone without tearing up the lawn or getting stuck?
Table of Contents

- What this applies to, and what you already need to know
- How long does yard grading usually take?
- What the work involves, step by step
- What a good grading plan checks before the first bucket moves
- When should yard grading stop being a simple dirt-moving job?
- The mistakes people make, and what they cost
- What changes on sloped, small, or hard-to-reach yards?
A small, straightforward yard can be finished in one day. A bigger or messier site may take several days. That is the honest range for how long yard grading takes and what the work involves, but access, slope, soil type, drainage fixes, and the amount of reshaping all push the schedule around. If you want water to leave the house instead of collecting in puddles, this is not just “moving dirt.” It is layout, cutting, filling, compaction, and final shaping. Not glamorous. Still necessary.
Who this applies to, and what you already need to know
This applies if your residential yard needs re-sloping, smoothing, or drainage correction and you want a clearer picture before hiring anyone or living through the disruption. I’m assuming you already know the basic headache: standing water, low spots, a lawn sitting below grade, or uneven soil after construction. I’m also assuming normal residential access for a skid steer, compact excavator, or small dump truck — in other words, a gate or route wide enough for equipment and a place to stage soil.
I would not call this a do-it-yourself job if the grade changes how water moves near a foundation, a retaining wall, a septic field, a buried utility run, or a neighbor’s property line. Then you are no longer just tidying soil. You are into drainage design or structural protection, and a bad slope can send water exactly where it should not go. For safety guidance on grading and drainage near structures, consult local building officials or a qualified landscaper or drainage professional, and see EPA and municipal guidance on runoff and site drainage. If a yard only needs surface smoothing after topsoil delivery, that is lighter work. But if the aim is positive drainage away from the house, careful layout becomes the whole point.
Think of grading this way: the goal is not a perfectly flat yard. In most residential settings, the target is a controlled slope, often around 2% away from the house for the first several feet, though site conditions and local practice vary. “Positive drainage” just means water moves away instead of sitting there. A flat yard can look tidy and still fail the first time it rains. A properly graded yard may look plain — and work for years.
How long does yard grading usually take?

4 to 8 hours is a fair estimate for a small, uncomplicated yard. A larger or more corrective job usually runs 1 to 3 days, not counting the wait before the crew shows up. That is the practical answer to how long yard grading takes and what the work involves, but the pace changes depending on how much soil the crew must remove, import, spread, and compact.
The quickest jobs are finish-grading jobs. The site is already roughly shaped, access is easy, and the crew is just dialing in the surface before seed or sod. Those often fit into a single day if the yard is not boxed in. By contrast, bad drainage, cut-and-fill work, wet clay, tree roots, tight access, or repeated rework can drag the schedule out. Clay, in particular, is a slog; it smears when it is too wet and turns brick-hard when it dries out.
And the machine time is only part of it. A crew can spend a chunk of the day checking elevations with a laser level or builder’s level, setting stakes, confirming where water should go, and deciding how much soil needs to move. That layout phase may take 30 minutes or 2 hours depending on complexity. It feels slow. It saves the job.
Weather changes the clock, too. After a rainy week, saturated soil is hard to compact and easy to rut, so the work can stretch. A dry, dusty site may move faster but often needs water during compaction. If the contractor has to haul away spoil or bring in clean fill, expect the timeline to grow by half a day or more because truck cycles and loading eat time. If an estimate sounds unusually quick, ask whether compaction, cleanup, and final rake-out are included. They should be.
What the work involves, step by step
Yard grading is a sequence: layout, excavation, fill placement, compaction, and finish grading. Each step does a specific job. It is not “push dirt around until it looks level.” That shortcut usually comes back to bite.
- Mark the problem area and fixed reference points. Set stakes or paint marks at the house foundation, hard edges, low spots, and discharge path, then establish a reference elevation with a laser level or builder’s level. Verify that you know where water must leave the area and where it must not go. A problem is any plan that does not name the outlet or leaves the house side lower than the yard side.
- Locate buried utilities before any digging. Call the local utility marking service, such as 811 in the U.S., and wait for marks before moving soil. Verify the marks are visible and that the crew understands the no-dig zones. A problem is any grading plan that assumes gas, electric, water, or communication lines are outside the work zone.
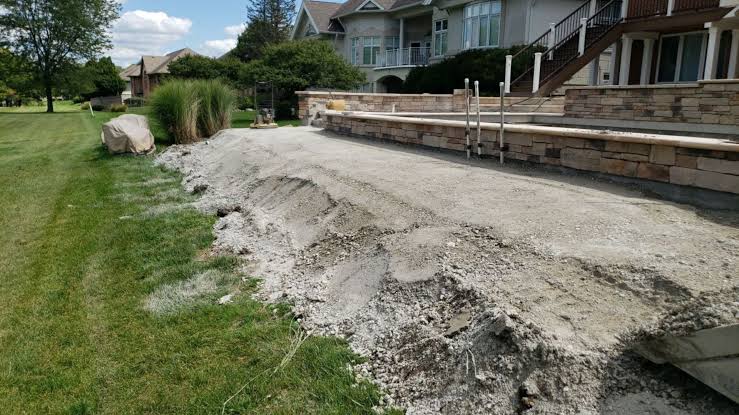
- Strip sod or loosen the top layer where needed. Remove turf and organic mat from high spots and areas that need re-contouring, usually the top 1 to 3 inches. Verify that you are not burying grass too deep in fill. A problem is leaving a thick organic layer under new grade, which settles and turns spongy.
- Cut high areas and reserve usable soil. Take soil from high spots first instead of importing fill too early. Verify the cut does not expose roots, foundations, or hardscape edges. A problem is overcutting and creating a second problem that has to be filled back in later.
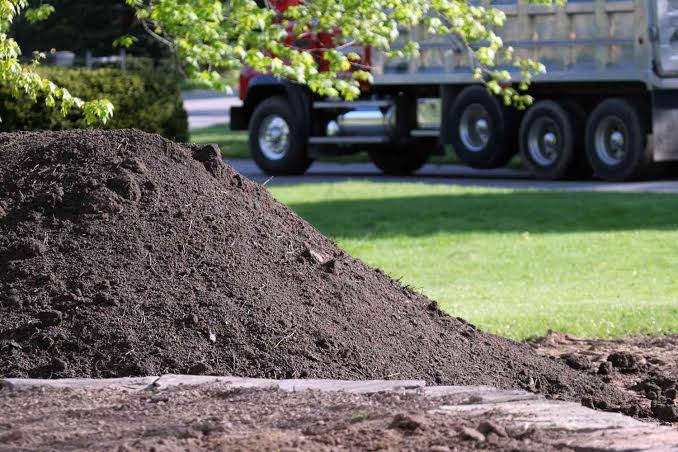
- Place fill in thin lifts. Build low spots with compactable soil in layers of about 4 to 6 inches per lift, not in one deep mound. Verify each lift is spread evenly before compaction. A problem is dumping a tall pile and expecting the top to settle evenly; it rarely does.
- Compact each lift. Use a plate compactor, hand tamper, or machine passes appropriate to the soil and area size. Verify the ground feels firm and does not pump water or depress under foot. A problem is leaving loose fill, which later settles and recreates the same low spot.
- Shape the final slope. Finish to a controlled grade, often pulling water away from the structure and into a swale, drain, or open yard. Verify the surface drains without creating a ridge at the foundation or a trench at the edge. A problem is making the surface look smooth while accidentally blocking runoff.
- Finish the surface for the next stage. Rake out stones, remove debris, and prepare for seed, sod, or erosion control blanket. Verify the top few inches are fine enough for establishment and that no voids remain. A problem is leaving clods and rocks that interfere with seedbed contact or later settlement.
A term worth knowing is cut-and-fill: “cut” means removing soil from higher areas, while “fill” means using soil to build up lower ones. That is the balancing act. When the soil math is off, the crew has to import material or haul some away, and the clock — plus the invoice — starts to move.
What a good grading plan checks before the first bucket moves
A good grading plan checks elevation, drainage path, soil condition, and access before any machine starts, and that pre-work usually takes 15 minutes to a couple of hours. The whole idea is to avoid creating a nice-looking yard that fails in the first storm. Pretty is not the same as functional.
I would want four answers before grading begins. Where is the water supposed to go? What slope already exists from the foundation, driveway, patio, or fence line? What soil is there — sand, loam, or clay? And how will equipment reach the work zone without tearing up the lawn or getting stuck? Miss one of those, and the estimate gets shaky fast.
Soil type changes the game. Sandy ground drains quickly and is easier to rework, but it can wash out if the slope is too loose. Clay is slower to shape and compact, yet it holds water and can stay sticky for days after rain. Loam sits in the middle. A standard residential grade might only need a modest fall, but a clay yard with no outfall may need more than surface shaping; it may need a swale, drain inlet, or amendment to keep water moving.
Access can turn a four-hour task into a three-day headache. If equipment can reach the work zone directly, the crew can move soil quickly. If the only route is through a narrow side yard or over finished hardscape, smaller machines and more hand work become necessary. That is slower, and it can wear the yard harder. Tiny access, big headache.
When should yard grading stop being a simple dirt-moving job?
Yard grading stops being simple when the water issue or site condition can damage something outside the yard itself. Then the right move is usually a more careful drainage fix, not faster machine work.
Water is entering the basement or crawlspace: That means the grade may be part of a larger drainage failure — Stop and address foundation drainage, downspouts, or exterior waterproofing before reshaping the lawn.
The yard sits against a retaining wall: That means soil pressure and drainage behind the wall matter — Modify the plan so the wall is not overloaded or underdrained; a bad grade can shorten the wall’s life.
There are visible utility covers, buried services, or a septic system nearby: That means excavation depth and runoff path are constrained — Keep the work shallow until the utility locations and system layout are confirmed.
The site stays wet or boggy for days after rain: That means the issue may be poor subsoil or no outlet, not just bad surface shape — Consider a drain line, swale, or other drainage fix instead of only grading the top layer.
The slope would send water to a neighbor’s property: That means the legal and practical risk is real — Redesign the drainage path so runoff stays on your side and does not create a downstream problem.
Because tree roots dominate the area, cutting too deep can harm the tree and still not solve drainage — Work around the root zone and avoid aggressive grade changes near the trunk.
The key consequence in all of these cases is simple: a quick grading job can make the visible surface prettier while making the underlying problem worse. That is the wrong trade-off. Some yards need drainage design first, then grading, so consult a drainage professional or local building official before changing the grade.
The mistakes people make, and what they cost
The most common grading mistakes are usually about slope, compaction, and timing, and each one creates a different failure.
-
Making the yard too flat.
Consequence: water ponds after rain, and wet spots return within weeks.
Correct alternative: keep a deliberate fall away from structures and toward a safe outlet. -
Burying sod, leaves, or topsoil in deep fill.
Consequence: the surface settles unevenly and turns soft or lumpy.
Correct alternative: strip organics before fill and compact mineral soil in layers. -
Working wet clay.
Consequence: ruts, smeared soil, and poor compaction that later cracks or dips.
Correct alternative: wait until the soil is workable or use lighter equipment and slower passes. -
Skipping compaction between lifts.
Consequence: the yard looks finished, then sinks in the first season.
Correct alternative: compact each 4- to 6-inch lift before adding more soil. -
Ignoring roof runoff.
Consequence: downspouts dump hundreds of gallons at the foundation during a storm, and the grade alone cannot keep up.
Correct alternative: route downspouts into extensions, drains, or a safe discharge point before finishing the grade. -
Assuming the cheapest quote includes cleanup and final shaping.
Consequence: the job ends with rough soil, exposed clods, and a surface not ready for seed or sod.
Correct alternative: ask what the estimate includes, especially haul-off, fill, compaction, and finish grading.
A grade is not judged by noon-time smoothness. It is judged by the first heavy rain and the first freeze-thaw cycle. That is where the truth shows up.
What changes on sloped, small, or hard-to-reach yards?
Because sloped, small, and hard-to-reach yards need modified methods, the work can take significantly longer than a simple open-lot job, depending on access and terrain.
On a steep yard, the crew may need terraces, shallow swales, or stepped grade changes instead of chasing one continuous slope. That slows everything because every transition has to be checked for runoff and stability. In a tiny yard, the machine may simply be the wrong tool for most of the space, so hand grading and compacting become the main tasks. And in a fenced-in backyard with a narrow gate, smaller equipment may be the only option, which means more passes and more cleanup.
One edge case people miss is a yard that is already lower than the house but higher than the neighbor’s lot. You cannot just raise it until it looks right. You may need a defined outlet, a catch basin, or a swale to control where excess water goes. Another tricky one is new construction fill. Freshly placed soil can settle for months, so a grade that looks correct on day one may need a touch-up after the first season.
If the area is being prepared for sod, grading has to be finer than rough shaping alone. Tighter finish grading helps sod root evenly and lowers the odds of dips showing through later. If the area is being prepared for seed, the surface still needs to be stable, but it can stay a bit rougher for seed-to-soil contact.