Last updated: September 10, 2026
Key Takeaways
- Walk the yard 30 to 60 minutes after a rain.
- Verify whether water is still there after 2 hours and again at 24 hours.
- Measure the direction of flow over at least 10 feet.
- Set stakes on each side and stretch mason’s line 12 to 18 inches above the ground.
To fix yard drainage, you have to find the low spots first. That is where water parks itself, slows down, and starts causing trouble. After rain, the clues are usually obvious — puddles, soggy turf, muddy paths, or runoff creeping toward a foundation. This guide is for a homeowner who wants a practical way to map the issue before digging or buying materials. I am not diagnosing a medical issue here, but I do want to say plainly that if standing water keeps showing up near a foundation, a septic area, a retaining wall, or a spot people or pets use, it makes sense to speak with a qualified drainage or landscape professional about your specific situation.
What counts as a low spot in a yard?
A low spot is any place where the surface sits lower than the surrounding grade by enough to hold water for more than a short time. That might be a shallow bowl only a few inches deep, a trench left by equipment, or a gradual sag across 10 to 20 feet. Shape matters. So does depth.
A 2-inch dip in clay soil may hold water longer than a deeper hollow in sandy soil because infiltration varies by soil type. Funny how that works.
The mistake I see most often is treating “the problem area” as if it were the same thing as the low spot. It is not. Water may appear downhill from the true dip, especially if the soil is compacted, the lawn has a thatch layer, or a swale is sending runoff into the wrong place. A swale is a shallow channel built to move water; if it is misgraded, it becomes a drain in reverse. For that reason, if the pattern is unclear or the area is close to a structure, consult a qualified drainage or landscape professional before you treat the visible puddle as the answer. USGS
This matters because drainage fixes depend on the shape of the ground. French drains, dry wells, regrading jobs, and simple topdressing all solve different failures. Skip the map, and you can send water somewhere worse.
One useful benchmark is how long standing water hangs around. Water that disappears in a few hours after a normal rain is a different problem from water still there the next day. The longer it lingers, the more likely you are dealing with a true low spot, compacted soil, or both. For anything near a foundation, I would not trust a hunch.
How do I find the low spots in my yard?
Start with a rainfall check, then add a visual sweep and a simple level measurement. Don’t rely on a glance from one corner. I’d begin with the lowest-tech method first, because it shows where water actually misbehaves; after that, confirm with a line level, laser level, or builder’s level if you want a repair plan. A laser level helps because it compares grade across longer runs than a bubble level can manage, but the tool only pays off if you set it up carefully. EPA
- Walk the yard 30 to 60 minutes after a rain. Mark every puddle with a flag, paint stick, or landscape marker and note its diameter in inches. Verify whether water is still there after 2 hours and again at 24 hours. A spot that looks wet but never ponds may be a soil or shade issue, not a low point.
- Look for the path of runoff on hard surfaces. Check patios, downspouts, driveways, and sidewalks for where water leaves the surface. Measure the direction of flow over at least 10 feet. If water is crossing toward the house or into a bed, the grade is probably wrong even if the lawn itself looks level. [NRCS](https://www.nrcs.usda.gov/resources/guides-and-instructions/engineering-field-handbook)
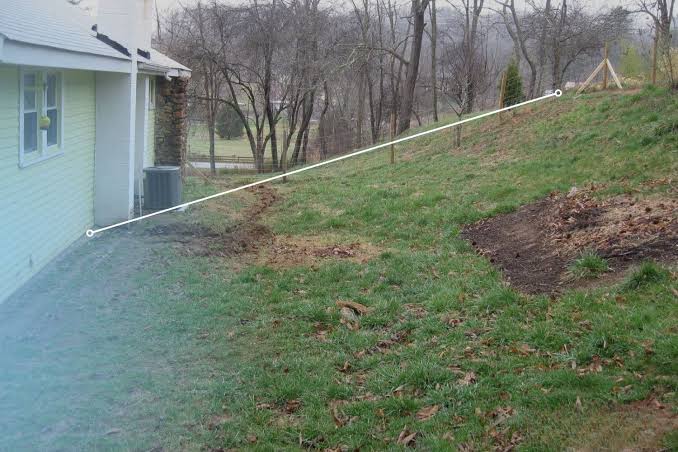
- Run a taut string line across the suspected area. Set stakes on each side and stretch mason’s line 12 to 18 inches above the ground. Use a line level or measure down from the string at 2-foot intervals. Verify whether the ground rises or falls relative to the same reference. If the drop changes abruptly by more than about 1 inch over 4 to 6 feet, you likely have a localized hollow.
- Check the lawn in a grid. Measure every 5 to 10 feet in both directions across the problem area. Record the distance from a fixed reference line to the soil surface. A grid exposes a broad sag that a single cross-section can miss. If adjacent measurements vary wildly without a clear pattern, you may be standing on mounded fill or over buried debris.
- Use a hose to create a controlled flow test. Run water for 5 to 10 minutes from one edge of the area and watch where it pools and where it moves. Verify the wet edge, not just the deepest puddle. If the water spreads evenly and drains slowly everywhere, the whole grade may be too flat, not just one pocket.
- Probe the soil in wet and dry spots. Push a screwdriver, soil probe, or long metal rod into the ground at several marked points. Compare resistance and depth. If one area is noticeably softer to 4 to 6 inches and another is firm, the softer area may be compacted or holding more moisture, which can mimic a depression.
- Trace the contour with a digital level or laser level if you have one. Take readings every 4 feet and note changes in inches, not guesses. Verify a continuous fall away from structures and a continuous path to an outlet. A dip that interrupts that fall is the spot to fix.
- Photograph and map the marks. Draw a simple site sketch on paper or in a notes app and place each low spot, puddle, gutter discharge, and downspout outlet on it. If you cannot explain where water goes in a single sketch, the site is not understood well enough for repair.
A good result is not “the lawn looks okay.” A good result is knowing which 10-by-10-foot area drops, where it starts, where it ends, and whether the water is trapped by soil shape or by something else. That level of detail is enough to decide whether the fix is topsoil, regrading, drainage pipe, or a different approach. If you only have one damp corner and no signs of larger runoff, I would keep the solution simple. If the whole yard tilts wrong, the fix is rarely small. Plainly, the ground tells on itself.
What tools and measurements actually help?
The best tools are the ones that turn a guess into a number, even a rough one. A 4-foot level, a 50-foot tape, a few stakes, string, and a notebook can tell you more than a shovel and a hunch. For larger yards, a rotating laser level is cleaner because it lets you compare elevation over long distances without constantly resetting the reference line. USDA NRCS
What matters is not just “wet” or “dry.” I care about three things: elevation change in inches, distance across the run in feet, and how long water stays on the surface in hours. Put those together, and you can tell whether you are dealing with a shallow bowl, a flat area with poor drainage, or a broader grade problem. In many yards, a difference of 1 to 2 inches over a short run is enough to trap water, especially if the soil is slow-draining clay.
Leaves, thatch, or a clogged gutter downspout can send you down the wrong trail. Those can create a wet patch without any depression at all. If you see the same puddle after clearing debris and after a dry spell, the shape of the ground is more likely the culprit. Another useful check is the edge condition: if water sits only at the edge of a patio or driveway, the hard surface may be shedding water into a low border strip rather than the entire lawn being low.
I also pay attention to where the yard meets structures. A slope away from a foundation is the standard goal, but standards vary by local code and site conditions. The exact acceptable slope depends on the structure and the soil, so I would not turn a general rule into a promise. If you are measuring within 6 feet of a house and the numbers are uncertain, that is the point to slow down, not speed up. Extension
When should you stop and get qualified help?
Stop and get qualified help when the drainage problem is bigger than a simple lawn depression or when the water threatens a structure or buried utility. Here are the situations where I would not treat this as a straightforward DIY grading job without consulting a qualified drainage or landscape professional:
Water stands against a foundation for more than a few hours: This can indicate a grading or runoff problem near the house — have a drainage or foundation professional assess it before you dig.
The low spot is next to a retaining wall, fence line, or driveway edge: Those edges can hide structural issues or failed backfill — avoid adding soil blindly and get the site evaluated.
You suspect a buried pipe, septic component, or irrigation main: Digging can damage utilities and make the problem worse — locate the lines first and use professional help if the route is unclear.
The yard slopes broadly toward the house, not just into one dip: This is a grade problem, not a puddle problem — simple patching will not fix it, and regrading may need a professional plan.
The ground is soft, sinking, or cracking: That can signal unstable fill, erosion, or subsurface movement — stop and have it assessed before any drainage work.
You are seeing water where it should not be, such as inside a basement, crawlspace, or garage threshold: This is no longer a cosmetic yard issue — get qualified help promptly.
If none of those apply, a careful homeowner can usually identify the low spots well enough to plan a modest fix. If one does apply, guessing is the expensive choice. Better to pause than to dig twice.
The mistakes that hide the real low spot
The most common mistake is chasing the puddle instead of the grade. A puddle shows where water ends up; the low spot may be several feet away. The result is wasted digging and a drainage fix that still leaves standing water. The better move is to map the whole flow path, even if that means measuring across 20 to 30 feet instead of just the wet patch.
Another mistake is checking the yard when it is too dry. Hard-packed soil can look level in drought conditions and reveal its shape only after rain. If you inspect only on sunny days, you can miss shallow depressions that hold water for 6 to 12 hours after a storm. The fix is to observe after rainfall and again the next day.
A third error is assuming “flat” means “fine.” Flat areas often need a planned fall so water can move somewhere safe. If a yard is nearly level across a wide section, it may shed water too slowly even without one obvious bowl. In that case, the correct alternative is not to fill one spot and hope; it is to re-establish a consistent slope.
People also ignore hardscape transitions. A patio edge, sidewalk seam, or driveway crown can dump runoff into a lawn pocket and make the lawn look low when the source is actually the surrounding surface. That leads to a bad diagnosis. The alternative is to include every adjacent hard surface in your measurements.
A fifth mistake is using too much topsoil to “flatten” the area in one go. Deep fills can settle, especially if the base is not prepared. That creates a new dip within a season or two. The safer alternative is to add material in thin lifts and recheck grade, rather than burying the problem under 4 inches of soil at once.
What changes in slopes, clay soil, and rainy yards?
Standard guidance needs modification when the site drains slowly, the slope is broad, or the yard has been altered before. Clay soil is the big one. Clay particles are tiny and compact easily, so a site can look only slightly low and still pond for much longer than a sandy yard would. In that setting, a shallow depression of 1 inch can behave like a basin.
Slopes change the diagnosis too. On a hillside, the low spot may not be where water ponds first; it may be where runoff slows behind a berm, tree root flare, or landscape edge. In a flat yard, by contrast, the low area may be obvious only when water has nowhere to go. The standard string-line method still works, but I would measure more cross-sections, often every 5 feet instead of every 10.
Rainy climates change the threshold for concern. A spot that drains in 24 hours after a light rain may still be a problem if it stays saturated after repeated storms. Frequency matters because repeated wetting can compact soil, damage turf roots, and make future ponding worse. In wet regions, I would put more weight on how the site behaves over several storms, not one event. NOAA
Lawns built on fill need special caution. Fill settles unevenly, especially if it was placed in layers that were too thick or not compacted well. If the yard was recently graded, a low spot may be settlement rather than a permanent contour issue. That can change the repair plan from “add soil now” to “wait, observe, and then correct,” depending on the site and local conditions.
How long does identification take, and what does a good map look like?
It usually takes one rain event plus 1 to 2 hours of careful measuring to get a usable picture of the problem. If you already have a puddle map and a simple grade check, you may need less. If the yard is large or has multiple runoff sources, expect to spend a weekend on it. That is still faster than fixing the wrong place twice.
A good map has three things on it: the lowest measured points, the direction water moves from each side, and the structures that change the flow. I like to see at least one reference line, one measurement grid, and notes on how long water stayed in each spot. If you can look at the sketch and say, “This area falls 2 inches over 12 feet into that corner, and the downspout makes it worse,” you have enough to plan the repair. EPA
What a good map does not do is promise a single solution. Sometimes the answer is simple reshaping of a 6-foot strip. Sometimes it is broader regrading. Sometimes the real issue is a downspout or hardscape discharge. That honesty saves time.
What should I do after I find the low spots?
Because the next step depends on what the map shows, you should choose the fix based on the shape, source, and size